This is my easy, step-by-step guide khổng lồ learn how to start a blog và make money from it. For 10+ years, I’ve been blogging và making money online—this is the best way to start blogging (and soon make money from your blog).
Bạn đang xem: How to start a blog in 2021: 5 simple steps
First, you’ll select a hosting plan (inputting your blog name comes next). Personally, I recommend choosing the Choice Plus plan because it comes with tên miền Privacy, which will protect your personal information (your full name, e-mail address, phone number and trang chủ address) from being published anywhere online.
Choosing your plan will look like this right here. Just click the green “Select” button on your plan of choice:
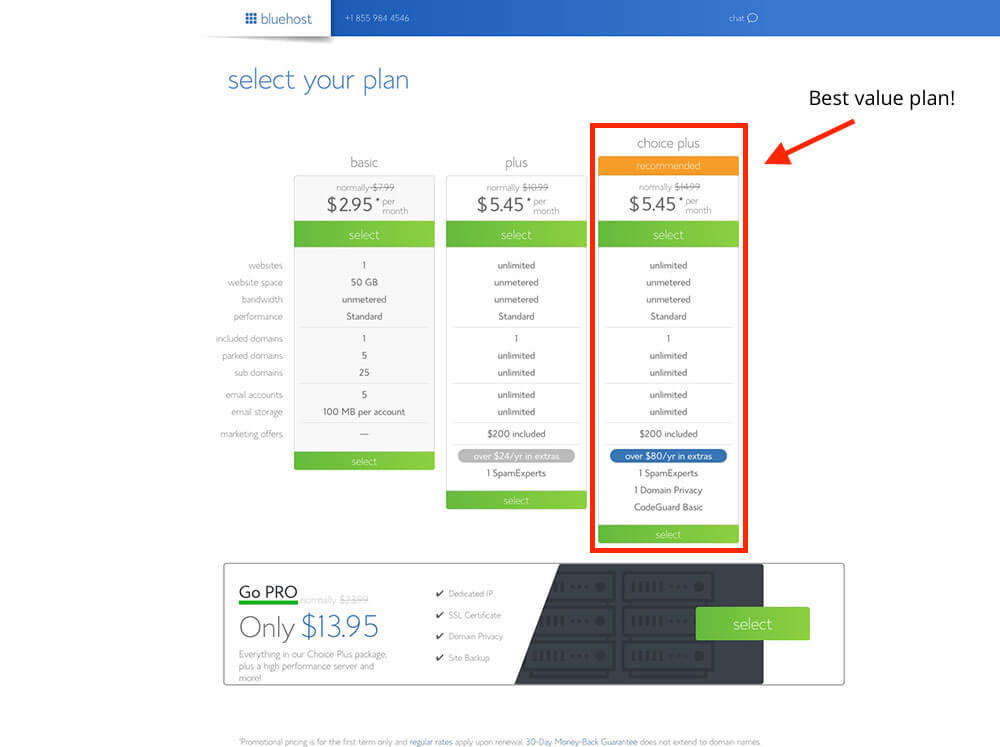
As I said above, I recommend choosing the Choice Plus plan, so that you’re getting the domain name Privacy feature that’ll protect your personal information online, but any of these plans will bởi as you’re starting your blog—and you can địa chỉ the domain name privacy in later during the checkout process for around $1/mo.
Pick your blog’s tên miền name
Next, you’ll get to lớn the page where it’s time khổng lồ choose your blog’s tên miền name:

Once you get to this step in the checkout process, just type in the name of the domain name name that you’d lượt thích your blog khổng lồ have (mine is giasuviet.edu.vn).
If you want khổng lồ run a quick search to see if your tên miền name is available, you can bởi vì it quickly right here:
Check if your tên miền name is available:Search for an available domain name:Search Domains
If your domain name name of choice isn’t available, you can either try another option that comes khổng lồ mind—or (what I recommend) select the option to choose your domain name name later after getting the rest of your tài khoản squared away & taking a little more time to think the name through. Plus, later on down in this guide, I expand some more on how lớn choose the right name for your blog if you’re not decided yet.
Here’s where you can click lớn choose your domain name later (it’s a popup that will appear if you hover on this page for long enough or move your mouse up toward the vị trí cao nhất of the page):
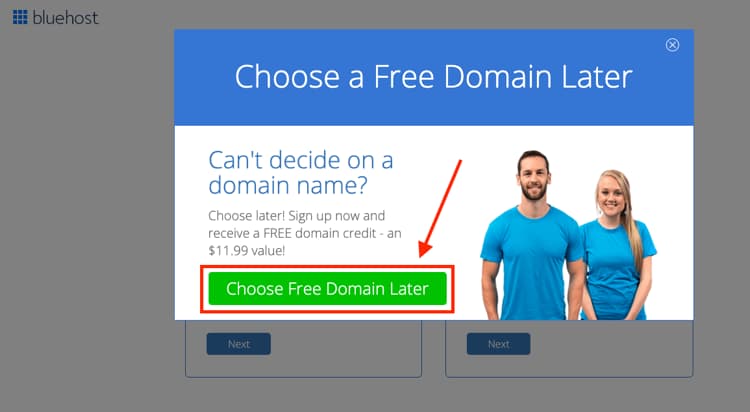
After either choosing your domain name name or opting khổng lồ select it later, you’ll be taken lớn the final step in the sign up process—creating your account.
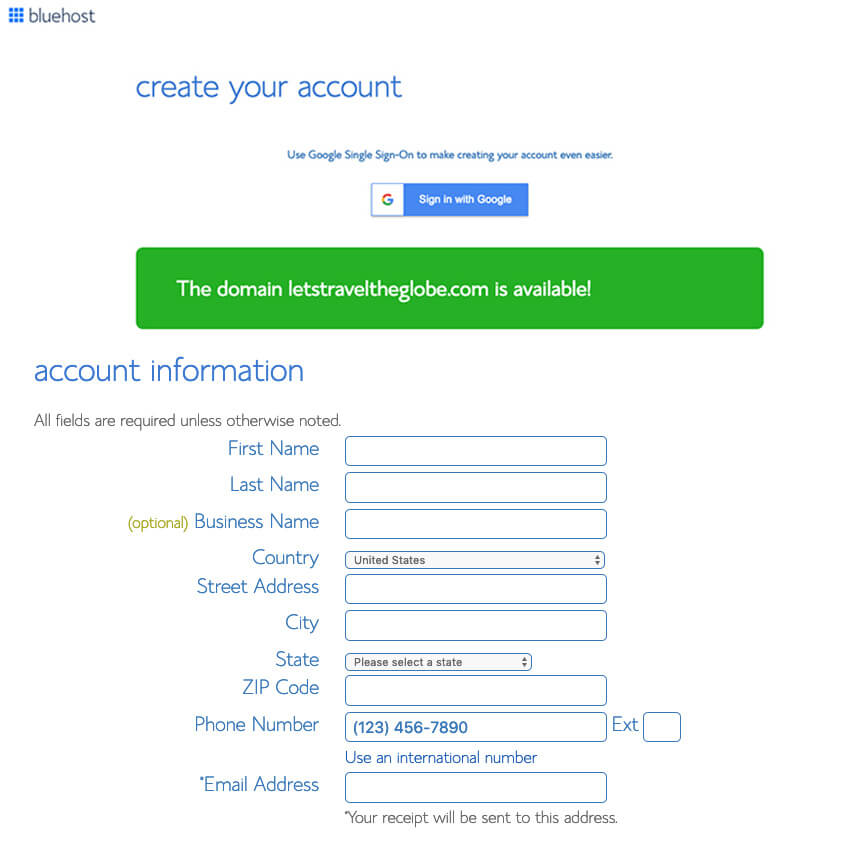
Create your Bluehost accountStart by filling in your trương mục details lượt thích your name, email address (it’s super important to lớn use an up-to-date e-mail address because this is where your login details và account information will be sent) & address. If you don’t want lớn enter your information manually, you can connect your Bluehost account with your Google account. Either works!
This is where you’ll choose an account plan based on the price you want khổng lồ lock in & how far in advance you’ll pay.
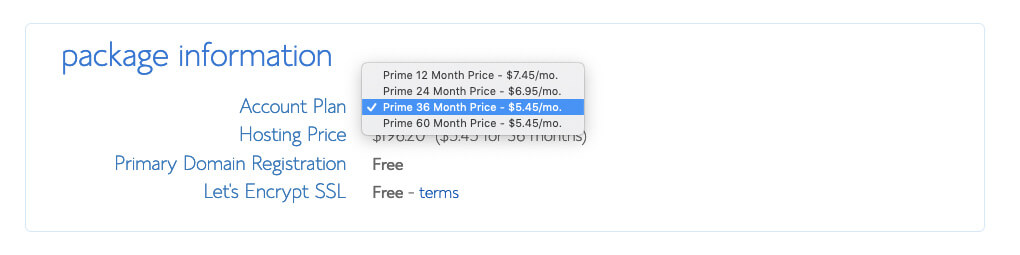
Note that Bluehost only offers options for you to pay 1, 2, 3 or 5 years upfront. They don’t offer a monthly payment option (because most hosting companies that vị offer monthly payments tend to lớn charge a bit more). Even still, with whichever plan you choose, the price works out to be a great deal for starting your own blog & getting it online today.
Xem thêm: Tải Phần Mềm Đổi Đuôi Video Sang 3Gp Video Converter, Đổi Đuôi Mp4 Sang 3Gp Trực Tuyến & Miễn Phí
Which pricing plan is best khổng lồ start a blog with?
Personally, I recommend choosing the “Prime 36 Month Price” if you want khổng lồ lock in the lowest possible price for your hosting. That’s what I use. & it secures your blog hosting at their lowest rate (and gets you domain privacy) for the next 3 years. And because this low pricing for new customers only applies khổng lồ the first payment you make, if you were to choose the 1-year plan, your pricing may go up after that first year.
That’s why if you choose the 36-month plan, your pricing will be locked in at this rate for 3 years. For that reason, I recommend going with the longest duration plan that your budget can spring for.
Choosing the right package extras (skip all but one)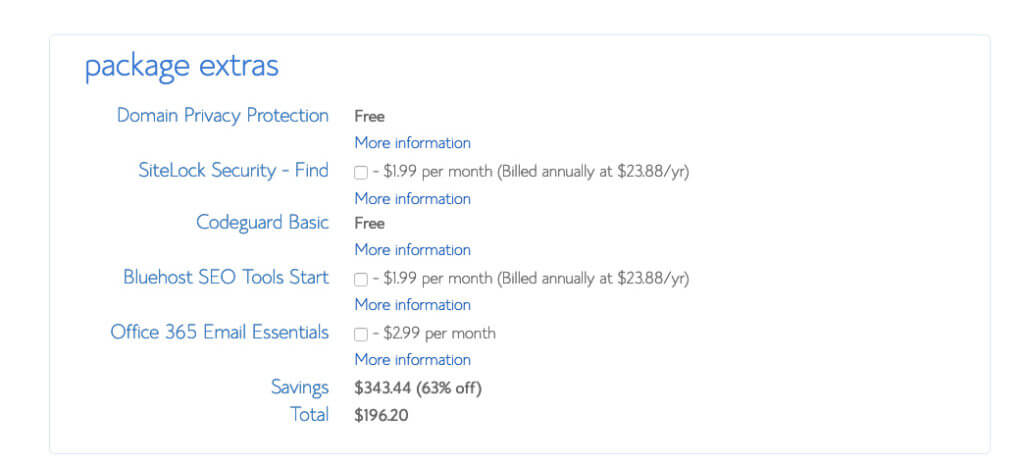
I recommend keeping the domain Privacy Protection extra, but you can get away with skipping the rest. Later on in this guide, I’ll show you the many không tính tiền and cheap plugins và tools you can use for things lượt thích SEO optimization, additional security and site back-ups, rendering most of the other package extras not necessary.
As I mentioned earlier though, having the tên miền privacy extra keeps all of your personal liên hệ information (your name, email, phone number và address) private. Now, if you chose the Choice Plus Plan on the previous screen, then your domain Privacy Protection will be listed as “Free” just lượt thích this screenshot above shows—it’s included in that plan.
If you chose a Basic or Plus Plan, then you’ll want to kiểm tra the box to add Domain Privacy Protection lớn your order for around $1/mo.
The total you’ll now see is the amount you’re going lớn pay today. Remember though, you won’t have khổng lồ pay again for 1, 2, 3 or 5 years depending on the package you chose. Plus, there’s a 30-day money back guarantee in case things don’t go as planned with your blog.
Enter your billing information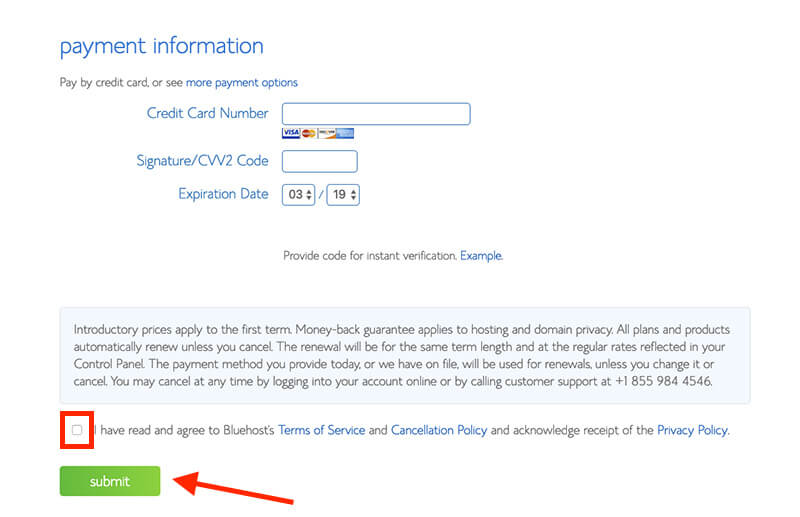
Now you’ll input your billing information, check the box that you agree to lớn Bluehost’s Terms of Service và then hit the green “Submit” button.
Woo! It’s time for a mini celebration


)